How to Use the 8D Method to Find the Root Cause of Nonconformances


The 8D method, also known as the 8 Disciplines, first appeared in Ford’s 1987 Team-Oriented Problem Solving manual. It’s a tool that’s stood the test of time, becoming the main problem-solving method used in the company, today called Global 8D.
Even though the 8D approach has been around for more than thirty years, many companies still struggle with ineffective problem-solving and weak implementation of corrective action.
This overview looks at 8D best practices and pitfalls to avoid, helping manufacturers better understand how to use the method to address nonconformances and reduce risk.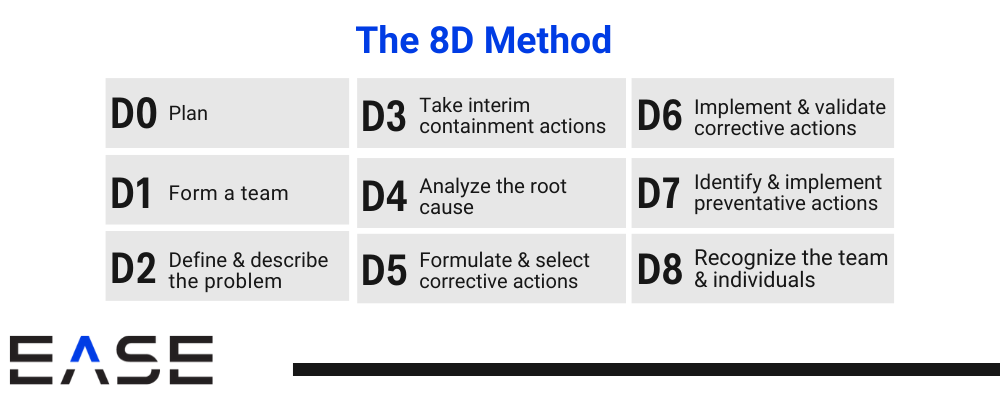
D0: Plan
Before you take any action to solve the problem, you need a plan to identify the appropriate people and resources for the job. At a minimum, your plan should include:
- A basic description of the problem
- Timeframe for resolving the problem based on risk
- Any resources needed
D1: Form Your Team
Creating the team who conducts the 8D problem-solving process is a weak point for many organizations. It’s critical to include people from the department in question, since you can’t solve a problem without those who have first-hand knowledge of it.
If it’s a part problem, the engineer responsible for design should be on the team. If it’s a production issue, you’ll want to loop in the supervisor from the specific work area. Just don’t make the mistake of thinking 8D is a paperwork exercise a quality person can complete from their desk.
D2: Define the Problem
This step involves gathering details and data to describe the problem completely, another area where people have a lot of trouble. Defining the problem could mean a Gemba walk to observe the problem on the shop floor, analyzing quality data and/or using is/is-not analysis to more precisely define the issue.
As much as possible, try to describe and quantify the problem in terms of:
- Who
- What
- Where
- When
- Why
- How
- How many
D3: Contain the Problem
Temporary containment minimizes the impact of the problem while you develop permanent solutions, and is especially important where product quality or safety is at risk. In some cases, you may need new processes to route around the problem until you have a permanent fix.
Many auto manufacturers make the error of stopping at this point, confusing containment for corrective action. Sorting mixed parts or cleaning up a mess addresses only the symptoms of the problem, not its root cause. The result: repeat problems, rising costs and potential loss of business.
D4: Identify the Root Cause
With the problem temporarily contained, you can now turn to analyzing the root cause of the nonconformance. Widely used methods include:
- The 5 Whys to dig into successfully deeper layers of the problem
- Fishbone diagramming to visually categorize causes during brainstorming
- Pareto charts to identify the vital few causes
Beyond simply generating hypotheses, you need to verify the root cause with key stakeholders, audits and/or statistical data when possible.
D5: Analyze and Select Corrective Actions
After your team has determined the root cause of the problem, you’re now in a position to identify what the best long-term solution is.
Brainstorming sessions combined with tools like affinity diagrams can help organize ideas based on their relationships and determine the most effective course of action.
D6: Implement and Validate Corrective Actions
It’s worth noting that six steps into the 8D method is when you’re finally ready to implement the corrective action, highlighting the key role of planning in this method.
Management needs to be an active participant in verifying implementation of corrective actions. That means they need to be a visible presence both on the shop floor and in regular reviews of key performance indicators (KPIs) to measure effectiveness. Leadership needs to set an example, examining processes through the eyes of the customer paying the bills.
Verification could also involve tools like accelerated life testing to simulate conditions that could lead to failure. If the problem has multiple dimensions, perform steps D4 through D6 until you can verify your corrective actions have addressed the problem as a whole.
D7: Implement Preventive Actions
Many companies rush to close the file on corrective actions, but real change only happens when you apply lessons learned to other areas to prevent future problems. For instance, if you fix one piece of equipment, but the same problem could occur on several other machines, the corrective action was not sustainable.
At this step, you’ll want to consider actions such as:
- Updating process audit questions based on corrective actions to reduce risk in other processes and periodically verify corrective action is still in place
- Introducing poka-yoke or error-proofing devices to high-risk processes
- Performing red rabbit tests to see how long it takes poka-yoke devices to detect defective product
D8: Recognize Your Team
After all that work, don’t forget to recognize the team. Whether it’s a financial bonus, special event or simply mentioning the team in a meeting or newsletter, this step is critical to building a culture of quality.
Because at its core, quality culture requires active participation from top management to front-line operators. And that kind of engagement—the kind where people take personal ownership of quality—is only possible when people can see that their actions have an impact.